Eight Budgeting Tools in Qmlativ
#Tips
Lauren Gilchrist

|
Lauren Gilchrist EdTech Thought Leader |
 |  | 
|
 |
1. Import a budget
Main menu > System > Import ManagerWhen you’re ready to import a new budget, use the small downward arrow on the left of your screen to open your chosen import. You can upload a simple two-column spreadsheet stating the account name and budget amount. In the upper right, you can select whether you want to Run Import to Generate Source File. If you choose this option, you can customize the layout of your budget. When you’re ready to go, select Run Import.
2. Budget Version
Main menu > Budgeting > Budget Version (under Codes)Budget versions can carry over in Skyward year after year, so there’s no need to re-enter data. On the Budget Version page, you can see your total budget and advance/roll back the budget version.
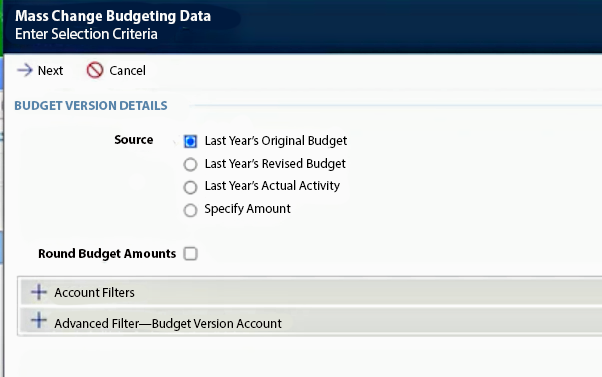
Use the downward triangle on the left to Mass Change Budgeting Data (because you shouldn’t have to make each change manually!). Choose a source to use as your starting point (last year’s original budget, last year’s revised budget, last year’s actual activity, or specify amount) and use the account filters if you want it to zero out certain funds. You can also add advanced filters.
If you're looking to advance or roll back the budget, use the downward triangle on the Budget Versions list to do so.
3. Security groups
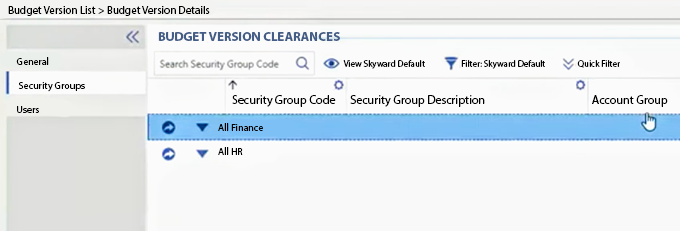
When you add a budget version, you’ll be prompted to add a security group. Security groups allow you to give certain roles access to specific accounts, so not everyone has access to all information.Add the relevant employees to the proper security clearance group and they’ll be able to see the screens they need to do their work.
4. My Budget Version Details
Main menu > Budget Version List > My Budget Versions > My Budget Version DetailsUse the My Budget Version Details page to view all versions of your budget on a single page. When looking at the list of budget versions, you can quickly identify whether a version has been adopted if the budget amount is greyed out (non-editable) and the box in the Adopted column is checked.
One helpful feature of this tool is that anyone with security group access can add items to a budget version. To add an item, click the arrow to the left of the budget. Once an item has been added, go back to the main Budget Versions Account list. Here you’ll see that the budget has been automatically updated to reflect the new addition.
5. Adopt (and un-adopt) a budget
Main menu > Budgeting > Adopt Budget (under Features)The budget is editable until it is adopted. With the Adopt Budget feature, you can choose to adopt the entirety of a budget or, if you only want to adopt part of it, you can use the filters to select which parts of the budget should be adopted.
If you use the Budget Amendments module, take note of the Beginning Balance/Revised Budget column. You can make changes to the budget without going through the budget code creation/adoption process.
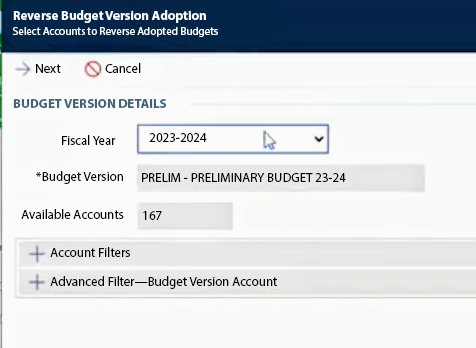
If you want to un-adopt part of the budget, go to the main menu > Budgeting > Reverse Budget Version Adoption (under Utilities).
6. Budget Summary Report
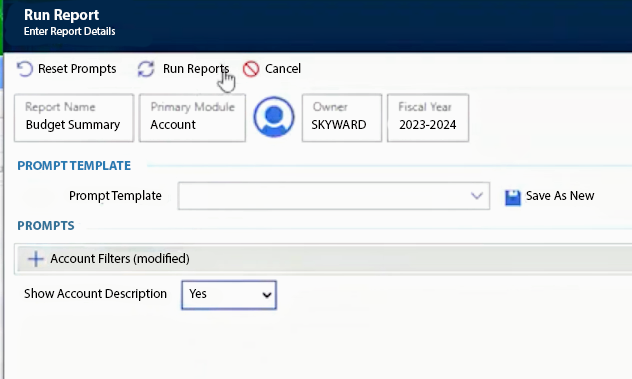
Main menu > Account > Budget Summary (under Reports)Say you want to show a budget report to the school board. You can use the Budget Summary Report to create this report. Use the filters to quickly select which parts of the report you want to run.
7. Budget Version Detail Report
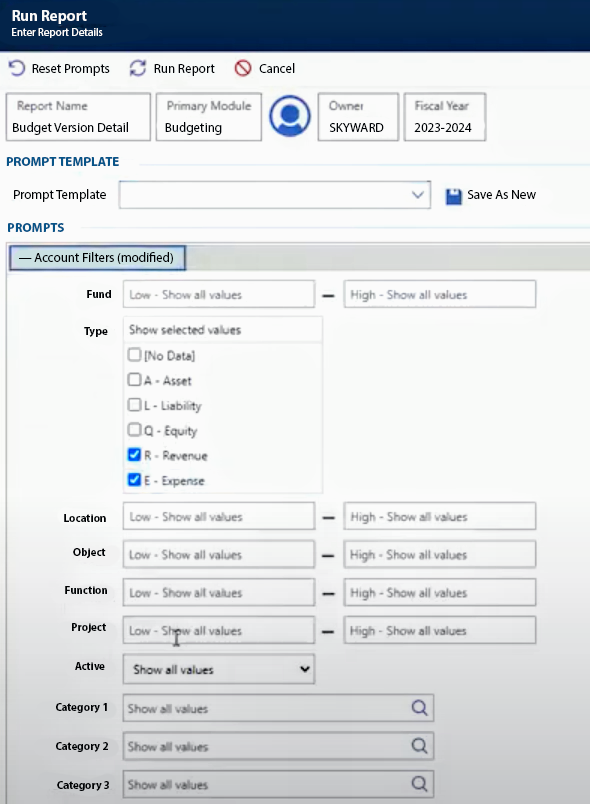
Main menu > Budgeting > Budget Version Detail (under Reports)This report gives budget version amount by fund, activity, and unexpended balance. Again, you can use the filters to select which parts of the budget you want to run the report on.
8. Budget Version Account Audit
Main menu > Budgeting > Budget Version Account Audit (under Utilities)Use the Account Audit tool to look for any accounts that are missing and pull them into the budget you are creating.
Work smarter, not harder with budgeting tools in Skyward. And stay tuned for more tips and tricks from the Skyward team!

 Get started


