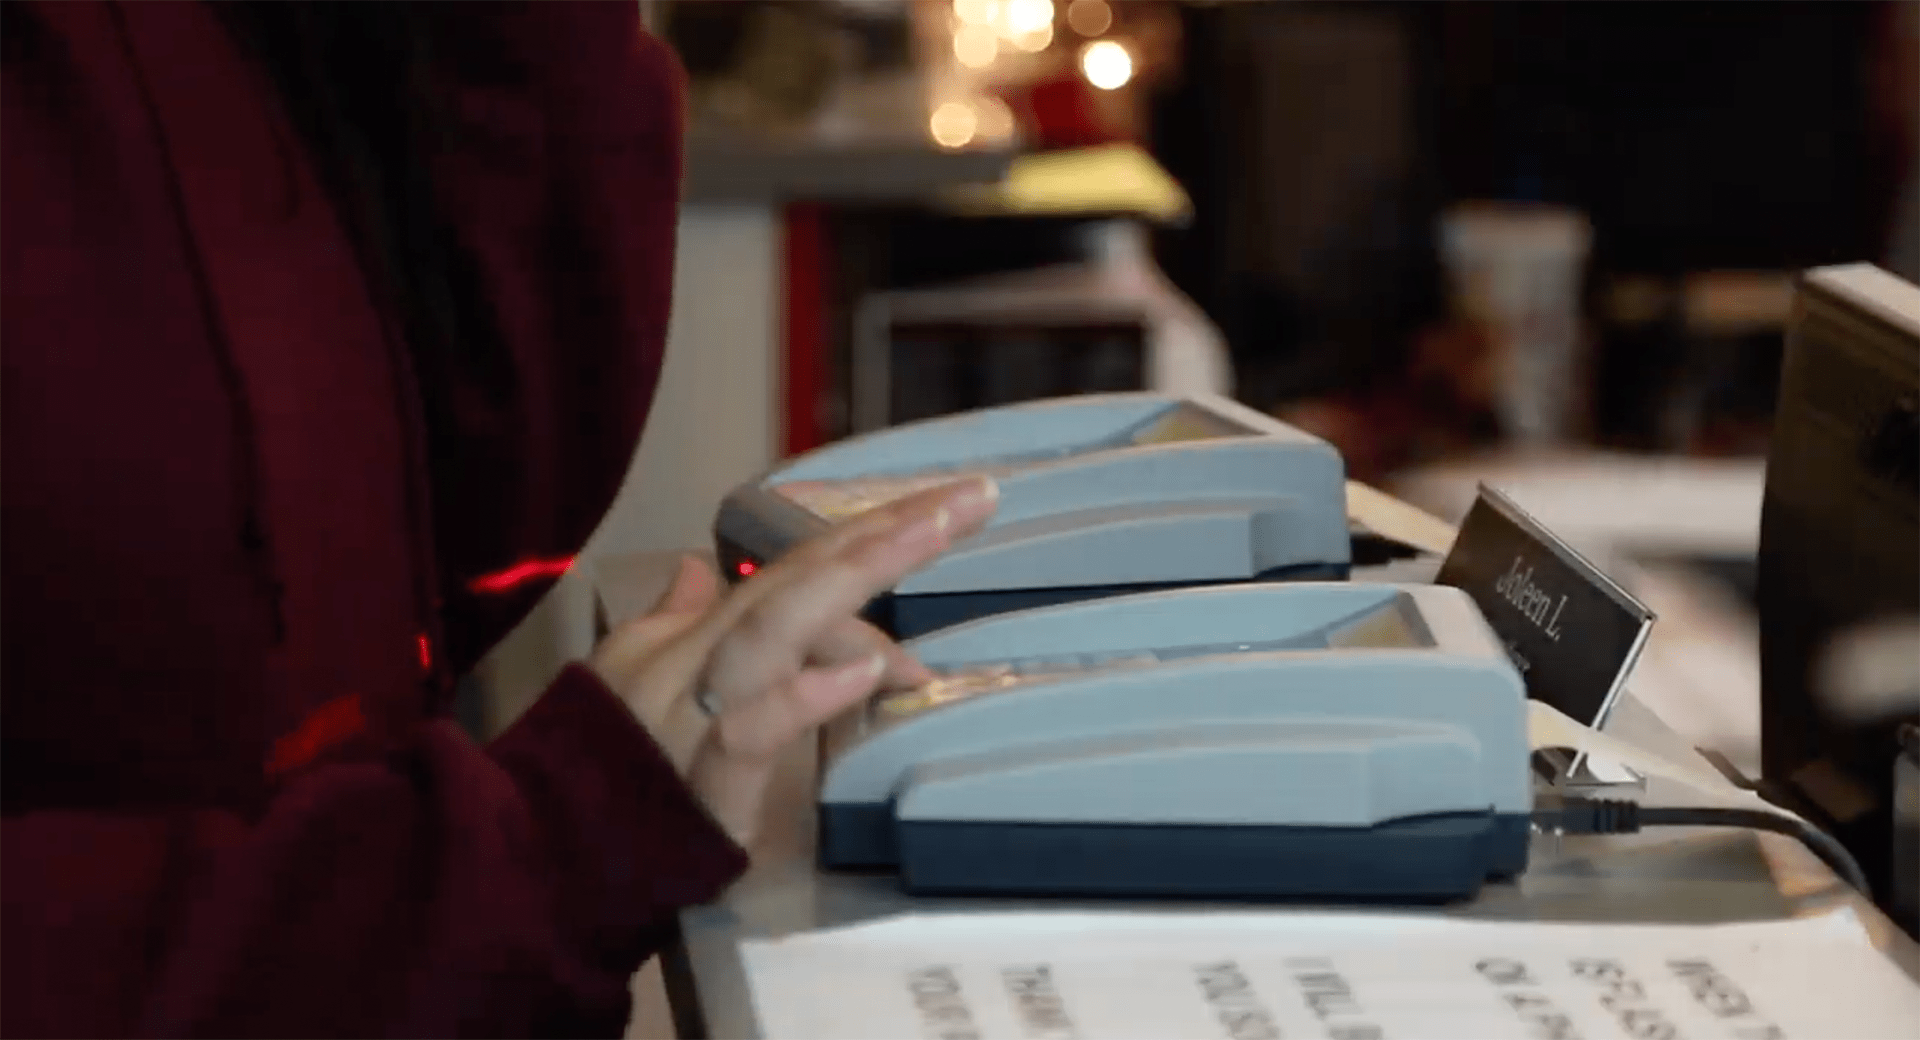
Setting Up A Tardy Kiosk
|
Lauren Gilchrist Blogger, Traveler, and Video Talent |

When your students show up late to school or class, it not only cuts into their own learning time; it also interrupts the work of office staff and teachers. Not anymore! You can put the responsibility of checking in back in the hands of students by using a tardy kiosk.
We’re going to run through the process of setting up one of these time-saving devices. But first, see a kiosk in action in this throwback video!
Create a Bell Schedule
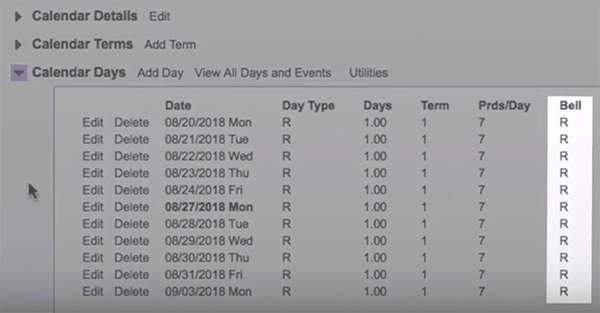
If you’re planning on using a tardy kiosk, you must have a bell schedule attached to your calendar days, so the system can mark students tardy for the appropriate periods. To be sure your bell schedule is set up:1. Click on the Office tab at the top of your Administrative Access screen.
2. Click the Setup button to the right of Attendance.
3. Select Codes, then click Calendar Codes.
4. Open your school year, then Calendar Days and verify that a regular bell schedule, signified by an R, is attached to each day.
Configure Your Tardy Screen
Once your bell schedule is in place, your next step is to configure your tardy screen.1. Click on Office at the top of your screen.
2. Under Attendance, click the Setup button to the right of Device Entry.
3. Select Configuration, and Tardy Kiosk Configuration.
4. Use the first field on this screen to determine how you’d like students to sign in.
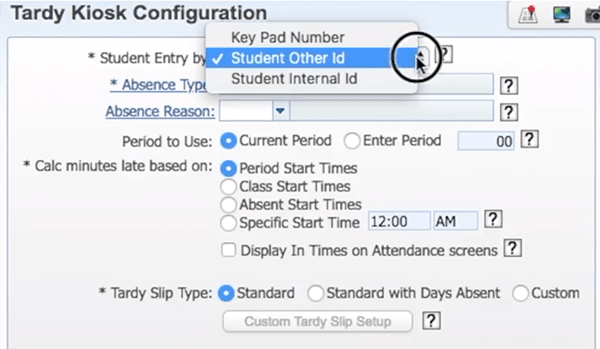
5. Enter the Absence Type that will appear on students’ records.
6. Select whether to record students as tardy for the periods when they signed in or if, for state reporting purposes, you’d like to record all tardies under a specified period.
7. Fill in the rest of the form, including checking the box for Display In Times on Attendance Screens if you’d like office staff, teachers, and students to be able to see the specific times students signed in.
8. Select a pre-defined tardy slip or customize your own.
9. Click Save.
Tardy Kiosk Options
When it comes to your physical tardy device, you have two options: You can open a tardy kiosk screen in Skyward or purchase a tardy kiosk with a barcode scanner from School Technology Associates, Inc.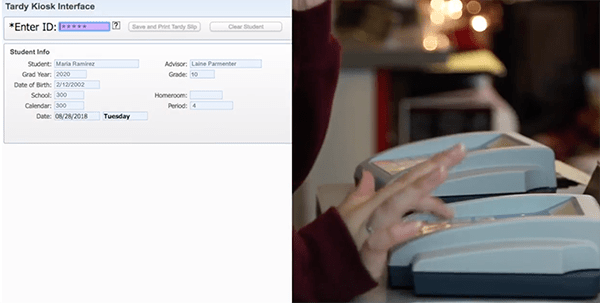
If you’ll be opening a screen in Skyward, you can do so on a computer, laptop, or tablet. We recommend creating a separate account for this device, since you won’t be able to log in on any other device while those credentials are being used on the kiosk. Once you’re logged in, follow these steps:
1. Go to Office, then Attendance.
2. Under Device Entry, click Tardy Kiosk. The system will automatically close all other Skyward windows when you proceed; this is a security feature to prevent students from viewing or changing information.
2. Click Enter Tardy Kiosk to open the interface.
Students can now sign in and be on their way! And you can view student tardies given by the kiosk the same way as those entered manually by teachers or office staff.

Don’t let student tardies interrupt office staff. Automate the process, cut out the middle man, and save time by letting a tardy kiosk do the work for you.
Follow-Up Resources
Learn more about how technology can make your school a more productive place to work and a better place to learn in Accountability Through Automation and One-Page Pitch: Positive Attendance.Thinking about edtech for your district? We'd love to help. Visit skyward.com/get-started to learn more.
|
Lauren Gilchrist Blogger, Traveler, and Video Talent |
Lauren enjoys visiting school districts and spreading the word about creative, non-traditional approaches to universal challenges. Follow her for on-the-scene reporting (with a little fun sprinkled in) and tips on how to enjoy a better Skyward experience.

 Get started

